Wednesday, November 2, 2011
Table for the Crisis Demo
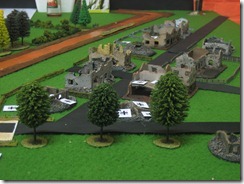
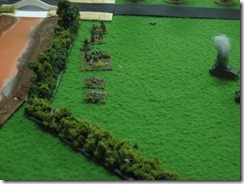
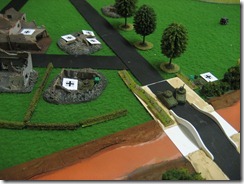
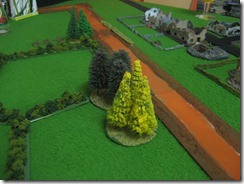
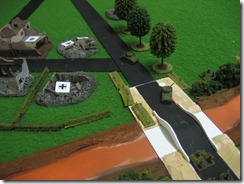
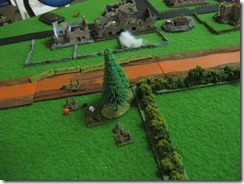
Here is the table set up for the Crisis Demo. Table size is 4" square. The terrain is simple, the scenario is as well, purpose is to show the different game mechanics, without getting bogged down in a scenario that is too big for an inexperienced player.
The forest tiles have woodland scenic trees on them, river tiles hand made, roads are strips of rubber, and everything else is scratchbuilt. I might pass by the model shop tomorrow for some more bling for the roads, I'm thinking a bit of track, some trees alongside the road, electricity poles, but that depends on the time left: Friday it's over to Crisis straight from work, Saturday morning we need to finish the set-up.
Thursday, October 13, 2011
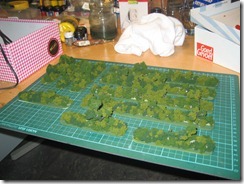
Flocking my river tiles
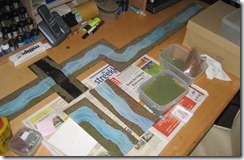
It’s time to start preparing everything for the Crisis demo. Here I’ve been finishing a few river tiles, to be used in the demo on November 5th.
Sunday, September 25, 2011
German Fallschirmjaegers: it ain't easy
I've been painting a few bases of 6FSJ troops for my Normandy scenario, but it's not easy to get a good impression of Oak Leaf Camo here. Just taking the correct colors and wet mixing seems to give a blotchy result, and a light wash of black increases detail but tends to make the mini's quite dark, and 10 mm need more light than normal, not less. It's only after making the macro pics (these things look ugly at 14 MP) that I actually saw some stained effect I don't like too much as well. I'm gonna freshen these guys up again with some sand and try some very fine brown and green pattern, but on a dry underground this time.
Tuesday, August 30, 2011
Started 6FSJ Germans
I started basing and coating a platoon of German para's for the Bloody Gulch scenario - and others around that period - and after coating them in grey I changed my mind and went for sand color, I think it is gonna be a better base for the camo suits they are getting. Only thing I am still struggling with a little bit is the paintjob. In the same scenario I am gonna field some SS Panzer Grenadiers, and they have camouflage armor as well. There are some minor differences between their uniforms, but there is no chance I - or anyone else as visually challenged as me - is gonna be able to recognize them on a gaming table.
 |
| Eichenlaubmuster |
 |
| Erbsenmuster |
Wednesday, August 24, 2011
Scenario: the battle of Bloody Gulch
 |
| Picture by Jacques Wood |
I am preparing the troop list for the scenario, I will focus on Easy company, I don't think the system can handle more than a company per side without grinding to a halt game-wise.
Sunday, August 21, 2011
Sorting through my Pendraken figs
I finally started on sorting several big ziplock bags full of Pendraken 10 mm WWII infantry, a bag of regular Germans, German paratroopers, regular Americans and Airborne troops, have gathered a number of multi-compartment boxes and wrote up some cards for easy searching, coz boy, do these look similar without my glasses.
I'm starting to base the units still needed for the crisis Demo we planned, and I have to make exactly what I need, time is running short, it's only two more months!
Here's what I'll be preparing, basing and prime-coating this week:
German Para Rifle Teams
German Para SMG Teams
German Para MG 34
German Para MG 42
German Para Mortar 80 mm
German Para PSK and PF
Some more Shermans
StuG IV
Tiger I e
JagdPz IV
Opel Blitz
Kubels
Jeeps
2 1/2 Ton Truck
M18 Hellcat
Some German AT guns and other heavier ordnance
Tank commanders + a system to be able to unbutton / button them up
German snipers (somehow I failed to acquire the US ones but Germans is a fine start for early Normandy)
Another platoon of US Airborne, more leaders and support, the scenario will be exclusively US Airborne, I need limits!
We'll see where we go from there, I'll be working on the scenario sheet this week as well, I intend to prepare exactly what is needed for the scenario.
Saturday, August 20, 2011
Some thoughts on smoke effects in game
I found some interesting articles on smoke employment in the military during my research for a practicable in-game smoke control system: When smoke is used, how will it behave over time, and what are the factors that influence it. As with everything, this is a search for a playable compromise, we are not making meteorological simulations here. So what I want to end up with, is a simple sequence every turn to check what happens with smoke on the table.
So I went and listed up what the results in such a sequence can be, and what parameters influence the outcome. Smoke is an absolute necessity in a good tactical WW2 combat game, and it needs to be implemented well, the thing is to find the limit to realism. What parameters are most important, what others will further influence the result?
So I went and listed up what the results in such a sequence can be, and what parameters influence the outcome. Smoke is an absolute necessity in a good tactical WW2 combat game, and it needs to be implemented well, the thing is to find the limit to realism. What parameters are most important, what others will further influence the result?
Sunday, August 7, 2011
Remarks after the 06/08 playtest
 |
| Jeroen leading a mix of the 82nd and 101st Airborne to a clear victory |
Jeroen came to the club to have another playtest session yesterday. We used the version 0.3 rules, with the new close combat rules, which we gave a bit of a testing. General flow of the game went very well, apart from some "where did I put that part of the rules" moments. I clearly need an index. Also, some of the rules have been developed - mostly in calc because I have access to statistic functions there - but have not yet made it into the rulebook. Some of those I found in my little black notebook, but it all caused a significant loss of time. The QR sheet was a big improvement, but I have to make sure everything relevant is on there. The huge gameturn sequence was over the top, and it does not improve game flow awareness. From all of this you'd gather the game went down the drain, but it actually went well, the general feel is becoming very tactical, choices really matter, it's not just roll better than the opponent.
Corrections and additions to the rules:
The to Hit table has no area type target, which we need for smoke
Area type target is not suited for concealed target, as it actually increases the hit chance.
ROF revision, enter it in the manual (UNITS) and QR sheet.
Infantry can only throw smoke as far as 1"
PF PSK Baz Ranges and TK# in manual and QR sheet.
Turn Sheet with wind indicator and weather effects overview.
Malfunction markers for main gun
Road yields movement bonus for vehicles, tanks only if CE
Generate indexes for the next version, the manual is becoming too big to do without.
Plans for the near future:
Make more bocage so we can try another type of scenario with an elevated road
Paint up utility vehicles, a few more tanks, and some US regular and German 6th paras
Design the scenario sheets for two types of scenario's, the village outskirts and bocage attack.
Thursday, August 4, 2011
Rules version 0.3 on dropbox
In order to facilitate preparation for playtesters I uploaded the most up-to-date version of the rules on dropbox: Find them here
Monday, August 1, 2011
Close Combat Chapter finished
Preparing for a dual RuneQuest role play campaign absorbed a lot of my time lately (making terrain, painting new miniatures, writing scenario's and so on ), and so it has been quite a while since I advanced with the SSOM rules. I have to press on and update the rules with all the remarks and feedback generated by the various playtests sessions, but it is a lot of work, even more so because I make a genuine effort to keep the structure of the manual intact: using styles and entering everything in such a way that generating indexes, footnotes, and table and illustration lists will be effortless. This requires a lot of discipline and slows down writing considerably, although I am confident in the long run it will make the task as lot more manageable.
I finally finished the Close Combat chapter, that features rules for infantry close combat, ambushes, concealment and cover, tank overruns, infantry versus tank close combat, and more. There is still a lot more to do, though. Here is the current list of open items (Chapter in capitals) as far as the manual is concerned.
| UNITS Heavy team: firegroup of rifle team and LMG/BAR team Heavy Squad: firegroup of 2 rifle teams and LMG/BAR team | ||
| COMBAT Mines and minefields | ||
| | Forward observer rules for artillery and mortars, also on board indirect fire | |
| MOVEMENT Infantry movement types and influence of terrain on movement | ||
| | Vehicular movement and influence on terrain | |
| | Limbered artillery, troop transport, tank riders | |
| GAMEPLAY Weather, wind, effects on smoke, fire | ||
| | Description of in game effect counters, dice, markers |
Sunday, May 22, 2011
Some cover ideas and the intro draft
Here are two idea's for the front cover that are probably not gonna make it, but it's a start, I'm playing with styles here. The cover description is still taking shape as well.
The manual is coming along fine, playtesting has been a real fount of ideas and improvements. The combat chapter is more or less finished, including close combat rules, overruns, fire groups, and different attacks, including cover fire, prepared fire, move and fire. The other chapters still are in their skeleton form, being less important at this stage of playtesting. The only other chapter taking form is the first one, the gameplay chapter. Here is the first page of the gameplay chapter so far:
The manual is coming along fine, playtesting has been a real fount of ideas and improvements. The combat chapter is more or less finished, including close combat rules, overruns, fire groups, and different attacks, including cover fire, prepared fire, move and fire. The other chapters still are in their skeleton form, being less important at this stage of playtesting. The only other chapter taking form is the first one, the gameplay chapter. Here is the first page of the gameplay chapter so far:
Saturday, May 7, 2011
The extended Sequence of Play
Edited 23.5.2011
Initial Phase
- Weather change
Roll dice to check whether the weather changes: precipitation, wind speed and direction, visibility might be affected.
- Smoke and Fire evolution
Evaluate the influence of weather on smoke and fire. Determine fire progression and smoke evolution: does fire spread? does smoke dissolve or spread?
- Reinforcements are prepared
Attacking player prepares his reinforcements and announces where they will enter, in order to warn defender of entry. That way defender can keep some firepower behind for the new troops. Otherwise defender could use up all his defensive fire before reinforcements enter the map.
- Air Strike resolution
Check whether an air strike occurs, as per scenario rules, and if so resolve.
- Off Board Artillery (normally in the beginning of the scenario)
If available, check for radio contact, if contact ask for spotting round, if spotting round fired correct and ask for FFE 1, 2, 3 and 4.
Rally Phase
- Repair broken down equipment
Equipment which broke down due to a original DR of 12 can be repaired by a successful Q roll by the unit carrying it.
- Replenish ammo at HQ
Units that are low on ammo or out of ammo can attempt to replenish ammo by moving towards the HQ and performing a replenishment roll (scenario dependant).
- Self Rally broken units
Units that are broken but not yet routed may attempt a self rally. An original DR of 2 triggers a leader creation.
- Rally broken and routed units with a leader
Broken and routed units that are in the command range of a leader may attempt to Rally. A leader can Rally up to two bases per Rally phase. This number is increased with the negative of the leader rating: a Q4+1 can only Rally one base, a Q6-1 can Rally three bases.
Combat Phase
- Execute attacker prepared fire until all ROF are expired
Units that perform prepared fire dedicate all their resource on firing. Units that have a ROF may fire repeatedly in this phase. Units that fire during the prepared fire phase may not move during the same turn. Units need to be marked after performing prepared fire. It is the task of the defending player to place markers for prepared fire and ROF. If he forgets the attacker can fire again.
- Attacker moves routed units - defender may perform opportunity fire
Routed units must (1)move away from the enemy (2)move into cover (3)move at normal speed. They can be fired upon by the defender. If routed units suffer a number of suppression equal to or above their Q, they are eliminated. If routed units cannot move away from the enemy, they surrender. The defender can use his ROF, and a marker must be placed once he has expended his ROF. It is the attacking players task to place markers for prepared fire and ROF. If he omits to do so, the defending player may keep firing.
- Attacker moves broken units - defender may perform opportunity fire
Broken units must move into cover, in a movement away from all enemies. They may stop their movement once they are in cover for every unit in their LOS. If they cannot move to cover in one turn, they continue moving to cover the next turn. If they can reach cover using fast movement, they may do so. The defender can use his ROF, and a marker must be placed once he has expended his ROF. It is the attacking players task to place markers for prepared fire and ROF. If he omits to do so, the defending player may keep firing.
- Attacker may move and may subsequently fire with any eligible unit - defender may perform opportunity fire
Movement and firing are linked. A unit must first move and then fire, suffering the advanced fire penalty. A unit can choose to remain in motion while firing. Vehicles with the ability to fire may elect to move, fire and continue moving. The defender may halt the movement at any time. The attacker may not move any more once the defender announces defensive fire. This includes changing heading. The defender can use his ROF, and a marker must be placed once he has expended his ROF. It is the attacking players task to place markers for prepared fire and ROF. If he omits to do so, the defending player may keep firing.
- Any defender units still eligible to fire may do so until all ROF are expired
If after all movement there are still units that have not fired defensively, they may do so, expending all ROF. A marker must be placed once he has expended his ROF. It is the attacking players task to place markers for prepared fire and ROF. If he omits to do so, the defending player may keep firing.
- Attacking player may fire with any capable unit, ROF does not apply
The attacking player may fire any units that are still able to fire, suffering the relevant modifiers for fire during the advancing fire and movement. Support weapons cannot benefit from ROF, they can fire only once.
- Attacking player may advance all units one base
All non-broken/routed, non-pinned/cowered units, whether they moved or fired earlier in the turn or not, may advance 1”, the side of one infantry multi man base. This advance may make a unit enter close combat versus another infantry unit, a single man counter, a piece of ordnance, or a vehicle.
Admin Phase
- Remove prepared fire and ROF markers
Bookkeeping segment where all markers indicating who performed prepared fire and who used up ROF are removed.
- Update the turn track
Presented changes after the 06/05 playtest
 |
| Kilian putting in his concealment counters |
- Smoke: size, turn per turn evolution. requires write-up for wind change and therefore weather.
- Post rout eliminiation: Routed unit that suffers one shot suppression > Q is eliminated
- Movement: first move routers (units that must move), then broken units (units that may move) before anything else
- Critical Hit: Mortar (and HE by extension) original DR of 2: Resolve infantry damage on HE caliber x2
- Close Combat: Write-up for Overrun and Charge. Requires ATM, Mines, DC
- Rate of Fire: LMG -, MMG 1, Mortar 1, HMG 2
- Low on ammo: Original DR of 11 means Low on ammo. Another original DR of 11 means Out of Ammo. Support units disappear - absorbed by adjacent units without any game effect. Units can replenish ammo by visiting HQ if available.
- Mechanical breakdown: Original DR of 12 means breakdown, requires a Q roll to repair during Rally Phase. Original DR of 6 means broken down beyond repair - replace if needed.
- Self Rally: Broken units MAY attempt self rally. Routed units MAY NOT.
Friday, May 6, 2011
Playtest session May 6th.
We had another playtest session in the HQ club house. A nice opportunity to put my new buildings on the table, as well as my as yet not completely painted river tiles.
The surface of the table is not ideal, but it does the job. Here is the right flank attack developing. A Sherman on the right has already been taken out by a Panzer IV on the hill.
The Panzer IV has been eliminated. The two remaining Shermans cross the bridge and start firing on the units they suspect are hiding there.
Meanwhile, the left flank is a mess. Every attempt to cross the ford and cut the wire is repelled, and there is next to no advance.
The tanks break through. The one in front is about to be ambushed by a Panzerfaust hiding in the rubble.
After fifteen minutes of intense casualty taking, the CO has an idea: let’s fire some smoke.
Thursday, May 5, 2011
Look at my bocage!
Sunday, May 1, 2011
10 mm bridge
In order to complete the 3+ meters of river tiles I made, I started working on the special features: a bridge for a ground level macadam road, a bridge for a raised earth causeway, and a lock.
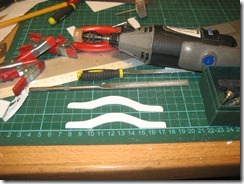
First step is making the two bridge sides, and make them equal. I went for a 7 mm height, to compendate for the unit bases.
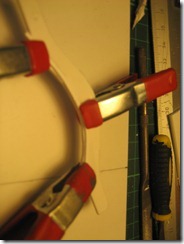
A narrow strip of plastic to support the deck is glued in,
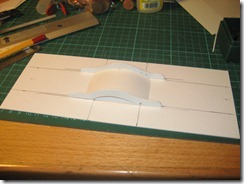
The deck is cut out too long, and then sandpapered to size so that the road to bridge transition is smooth.
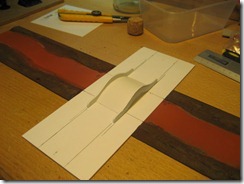
Penciling in the road and river boundaries. Using foam and card I build the river banks. Tomorrow I'm basecoating and brushing the earth tones mix on.
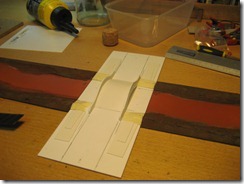

First step is making the two bridge sides, and make them equal. I went for a 7 mm height, to compendate for the unit bases.

A narrow strip of plastic to support the deck is glued in,

The deck is cut out too long, and then sandpapered to size so that the road to bridge transition is smooth.

Penciling in the road and river boundaries. Using foam and card I build the river banks. Tomorrow I'm basecoating and brushing the earth tones mix on.

Sunday, April 24, 2011
Set of 10 mm river tiles: phase 2
All of the regular tiles have been constructed, plastered, based and painted in a mic of browns and greens, and then covered with a thick layer of home made burnt umber terrain wash - and STILL there is some foam peeking through - but nothing that the subsequent flocking will not take care of. But before flocking I am going to carefully paint the river bed white, and then gently wash with greens and blues, topped of with a good strong gloss varnish. Some pieces are still in the pipeline: The bridge + road crossroad, the river + stream junction, and the lock for the Carentan scenario (and any other scenario where a lock is needed, of course). All combined that's over 3 m of river!
Saturday, April 23, 2011
Some Pendraken 10 mm ruined houses painted
Here are house #1 and #2 from Pendraken after cleaning up and painting. This turned out to be simple and straightforward. The houses both feature a narrow rim which I suspect was originally intended to support a remnant of the second floor floorboard. I'm definitely going to make a bit of floorboard and try that out. Apart from that, the pictures reveal some details I have got to take care of, and then these are ready for battle!
Friday, April 22, 2011
Tuesday, April 19, 2011
WW2 10 mm Rubble etc. review
One of the things I brought home from Salute was a selection of 10 mm terrain items: mainly rubble, but also some walls, fences, and a few bridges. I got stuff from three different manufacturers: Pendraken, Time Cast and Field Works.
Sunday, March 20, 2011
Presented changes after 18/3 playtest
0. General ideas:
- Command points need to work more directly: player must have the option to use up their command points, leaving none for defense, if they want to force the attack. The highest commander on board can generate command points, say Quality x 2 plus a D6 bonus - this will even out the variation a bit. OR we can have each commander on board generate points, although this means more administration.
- Alternatively, we can have movement switch sides quicker, for instance by rolling against the leader quality, losing the turn (the turn goes to the opposite player) if the roll fails. The goal is to have a game that is relatively quick, and that keeps both players involved as much as possible. This has to be tested in a game situation.
Saturday, March 19, 2011
S²OM Playtesting Session
My mate Kilian came over Friday for a good playtesting session, this was the first time a number of new game mechanics were put to the test, after the rather large overhaul that was a result of the last round of test games. Also, it was the first game to actually use finished Pendraken miniatures. The terrain was still a bit make do, using dirt roads and rivers from the RuneQuest 28 mm terrain, only having a few houses that were only half finished, and using 28 mm trees instead of trees adapted to the scale. But it still was a nice game, that I spectacularly lost, even after getting my 3 Sherman tanks back a second time.
Here is the German defense. Kilian had to protect a factory unit against an assault by the American Airborne. Nothing too historical, the story was secondary to the testing. He had a few infantry squads, off board 105 mm artillery, and a few tanks, including one tremenduously unbalancing Panther.
The Americans, that would be me, mounted an attack on the right flank, as well as a tank charge across the bridge. The tank assault was stopped in its tracks by a Pz IV G, leaving the bridge blocked. The last tank than tried to take up position on the right, but got immobilized in the woods and was subsequently destroyed by the Pz IVh. By that time, the Panther was already on the board, making the situation all but hopeless. So much so, that we agreed to allow the 3 Shermans to re-enter as reinforcements. It made little difference, the Panther alone was alone to stop the advance, and infantry never got close enough to try a potshot with a bazooka. To make things worse the German artillery started to score hits, and if not for the totally inadequate new HE table, things would have gotten really really ugly.
Thursday, March 10, 2011
Making a river set for 10 mm - phase 1
On the list of terrain I still have to prepare for playing SSOM is a good set of river tiles, including corners and so on. I cut up a few 100 x 250 mm sheets of pp, 2 mm thick, and started cutting 50 mm wide masking tape.
I cut it in a wavey line, then glued the straight edges in the middle to get a natural flow while still keeping a 50 mm width. On both edges I indicated a 25 mm bank, in order to make sure the rivers fit together well.
I made a total of 8 straight pieces, that's 2 meters of river, and some corners, 4 straight corners, and a ford.
Using leftover strips of foam I made the rought bank shapes. After doing all the pieces I cleaned up the edges and made sure the banks more or less aligned. Not perfectly, but I managed to get rid of the biggest misses using an exacto and a big dollop of patience.
I cut roughly and let the glue dry overnight before starting to refine the shapes: that way I avoided tearing off pieces of foam.
I made up a bowl of home improvement plaster, and started smearing and sculpting. Quite a lot of plaster went into it, but I did manage to get all corner parts done, and partly finished the ford. With the plaster not yet completely dry, I start tearing off the masking tape.
Apart from a few smudges, this makes for very nice edges. The smudges will probably remain, I might try to clean them up later, but it just adds a bit of irregularity.
Wednesday, February 23, 2011
Second attempt at making modular 10 mm WW2 houses
I restarted working on a number of modules that will allow me to make a large collection of house fronts and roofs for houses in a row as found in Normandy. I use pattern sheets and a mix of scratch built components, and add a sheet of plastic, cleaning up the edges with white milliput so I can make clean silicon moulds out of them.
Just for dimension illustration: a 10 mm leader walking past a house.
Just for dimension illustration: a 10 mm leader walking past a house.
Monday, February 21, 2011
The perfect 10 mm storage
A sheet of magnetic material is glued into every 10 x 13 inch drawer (25 x 32 mm) adding up to almost a square meter (10 sq.ft.) of magnetic storage surface!
Now that more and more 10 mm troops are getting finished, I have been looking for some intelligent storage solutions. I had been thinking about a drawer block like this for some time, but most had high drawers, which loses room. I had seen this type with 10 drawers, each 20 mm high, and it looked like a good idea, but rather expensive: thses drawer units costs 95 Euro. Imagine my joy when I found one with a slight damage, priced at only 10 Euro! I have cut and glued in the magnetic sheet, and this cabinet will hold a lot of infantry!
Friday, February 18, 2011
Wednesday, February 16, 2011
Tuesday, February 15, 2011
Sunday, February 13, 2011
Subscribe to:
Posts (Atom)


