Thursday, December 30, 2010
Wednesday, December 29, 2010
Painting a test squad + some weapon teams
I decided to go for the 'base first - paint second' approach. I tested whether the individual figures remain accessible, and that seems to be the case, so I glues the figures and put some texture on using cork, grit and some vallejo sandy paste thats is way past its date. Seemed to work nonetheless. Here are the miniatures, after priming with Army Painter Army Green
Second step is the base colours. I used a mix of GW colors and Vallejo (FOW Range) but the FOW US set seems to have no para uniform green, so I mixed that up using catachan and green grey with a hint of knarloc green. I'll see how it looks once it's dry.
Back row is a leader (non marked as yet) and a bazooka team.
After getting some feedback I corrected the base colors of the weaponry, painted the boots in red leather, helmets in catachan (olive drab wannabe), and repaired some basing holes where a chunk of grit fell off. Then onto step three: washing everything with a dark brown dipping wash.
Fourth step involves painting on some detail, adding highlight to the uniform, using a khaki + 20% olive to get the typical off-khaki of the M42 airborne uniform. Or so I hope.
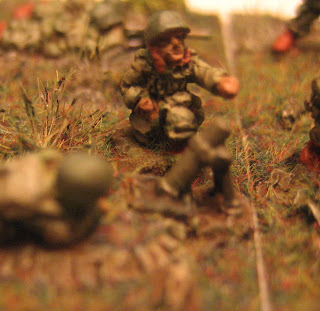
Here are the units after flocking, I though about going back in to correct some small details, you keep seeing stuff you can improve when you're painting through a 2,4x magnifier lens, but on the table I think they look just fine. Not bad for a first set.
Monday, December 27, 2010
Prepping US D-Day Paras
Here are all the para units, minus the infantry support weapons, cleaned up as well as I can without magnifying glasses. Before priming I'll do a second check under the mag lamp. I'm gonna prime in US Green.
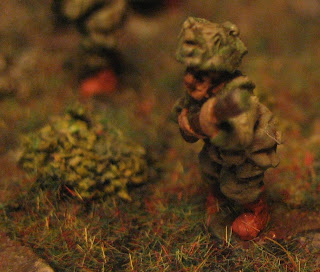
Detail of a para armed with a M1 para carbine. I wonder what is on the helmet. First aid kit?
Detail of a para armed with a M1 para carbine. I wonder what is on the helmet. First aid kit?
Sunday, December 19, 2010
German tank cards
I'm preparing everything to test the tank rules. I do not expect a lot of difficulties, although we will have to determine all the hit modifiers while testing: we will start with the following:
Range modifier: as indicated on To Hit Table
Size modifier: as indicated on tank card
Changing firing arc:
Normal turret: -1
Slow turret: -2
No turret: -4
Moving target ≤ 10 cm: -1
Moving target > 10 cm : -2
Dashing (defense fire, target start out of sight): -2
Partially visible: dice roll determines hit location
Wednesday, December 15, 2010
10 mm windows
I have acquired some windows from houses in HO scale that I have been using, and it kinda works, but I want to try and make my own. For this, I'll need a two part cast, and 10 mm windows are small! THe size I'm going for for a full size window is about 6x9 mm. That means the woodwork is made in 0,5 mm evergreen strips.
It took me the better part of an evening to finish one window, partially finish another (in another style) and finish one window frame, all of those without gap filling and sanding. On the plus side I have finally found a good use for my 5x magnifier glass.
It took me the better part of an evening to finish one window, partially finish another (in another style) and finish one window frame, all of those without gap filling and sanding. On the plus side I have finally found a good use for my 5x magnifier glass.
Not so brilliant mould
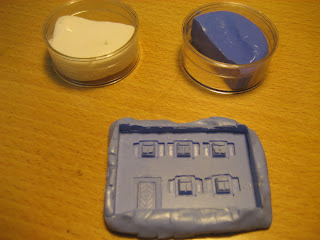
I tried to make a mould from a piece of wall with the exact size of a two floor terrace house, and although the borders are now a lot better than the first time around, I failed to notice a dent – not enough putty – in the stone texture. I’m gonna make some casts in ceramofix, zellane and resin to test the detail and smoothness, but after that, this mould is gonna go where all the others so far have gone: in the bin. That’s another 5 Euro. I’m gonna stop using the paste, and start using the liquid version, I expect better results with that, once I have found the perfect container to make moulds in.
Tuesday, December 14, 2010
Falaise Gap - BKC rules - 15 mm
This is the setup of the game. I'm playing the Germans, nearest, and have set up 2 Mortar units on the small mound on the right, intending to advance the third. Bad call to start with, I would have been better putting the FAO on the hill on the left, and the three mortars all together. On the other hand, that just might have attracted a bit more artillery.
Tuesday, December 7, 2010
German Tanks in version 0.1
Here is the Tank ID Card which will be used in game. The player has a card for every type of combat vehicle in game. The cards feature all relevant info needed in game: Tank name, main gun type, rate, penetration and ammo types, machine guns, armor on turret and hull front, side and rear, movement allowance, crew survival, and smoke availability.
And these are the tanks available at the outset. Evidently, this list will grow, and more obscure vehicles will be features eventually, but these 5 offer a good starting point.
PzKpfW IV F2/G (rare by D-Day)
PzKpfW IV H/J (common)
PzKpfW V G 'Panther' (quite common)
PzKpfW VI 'Königstiger' (rare)
Saturday, December 4, 2010
Some terrain impressions
This is far from final, just an impression of how the terrain - homemade and from a variety of suppliers - is coming along. I definitely need bases for the houses, with hedges and grass on them, to get a realistic impression for houses with gardens. I also need a system that keeps the roads in place better, I hate it when they are not flat on the table.
Thursday, December 2, 2010
First 10 mm building casting attempt
Given the limited choice in 10 mm WW2 buildings and the poor coherence between different suppliers' models I decided to try and cast my own. This means build the original. make a cast, and cast different units. Of course, I want some variety. I decided to go ahead and attempt a row house front first.
I started out by making a complete 10 mm two store building in Normandy style. That was my first mistake. I had to rip it off of the plastic board, and the glued construction is far from stable, considering you need to exert some serious pressure to get your detail in there. The second mistake is the use of architect board. Way too soft, impossible to smooth before casting, so you have a lot of cleaning up to do afterwards.
I tried to make the edges are clean as possible, added a little frame for the door, and then started mixing the silicone paste. This is a putty version, that goes very soft when mixed together, and is really easy to blend. The detail is superb. That was the first problem with the mould. I cut out the holes for the windows without taking into account the depth. Some of the shutters are not perfectly against the wall. Not a problem for a one off, but a big issue for a mould: putty creeps between every nook and messes up the finer details.
Another issue: the edges. You really need a box to push your putty and original into. I grabbed a bit of flat board just to make sure I have a straight bottom on my mould, but that's only 50% of the story. First impression the mould looks great, but on closer inspection there are a lot of areas where the putty crept into small crevisses. I tried to repair this but obviously this wasn't easy.
Nevertheless I cast a row house front in my new mould, and the result was not too bad. For row houses, you just need fronts and rears, the rest can be architect board. If you zoom in you'll see the zones where I had to perform repairs, some missing detail, and some bubbles (I forgot to take care of these) but it is also clear that if you have a good original, the mould can be amazing. I'm gonna paint this one anyhow just to see how it looks.
So from here, the next step is making some clean originals. I am thinking about making parts that are multi-use, like two windows, a window and a door, a shop window, three windows, so that I can assemble houses with little effort. In order to have clean edges, I'm gonna look for 3 mm thick plastic board. You can get a perfect edge on those, they can be sanded, scratched into, and so on. Alternatively, I could use 2 mm board and put a nice flat layer of white milliput on it, so that I can sculpt in brick details and textures. That should keep me busy for a week or two.
Subscribe to:
Posts (Atom)


